Spoon Graphics | Latest Blog Entry |
| Create a Cute Baby Monster Character in Illustrator Posted: 03 May 2010 12:00 AM PDT There’s been a lack of monsters in recent posts here on Blog.SpoonGraphics, so here’s another vector monster tutorial for all you designers learning Illustrator to get stuck into! Use Illustrator’s basic shapes to form the outline and structure of a cute baby monster character, before adding colour, gradients and effects to bring the design to life.
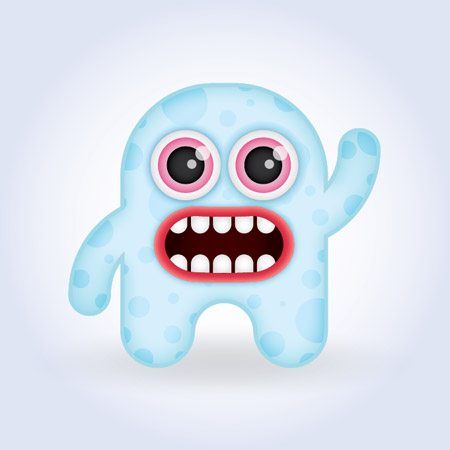
Here’s the character we’ll be creating this week. The soft rounded edges, large wide eyes and large forehead all combine to give the impression of a cute and friendly personality. The soft baby blue and pinks also tap into the common colour schemes related to babies and infants.
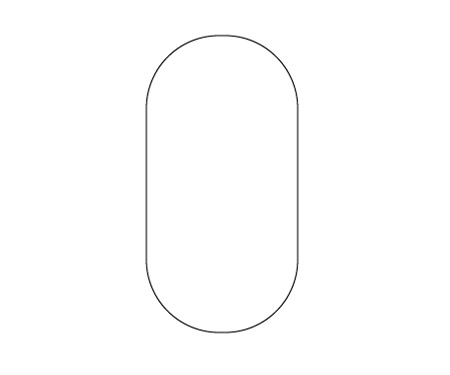
Open up Adobe Illustrator and create a new document. Grab the Rounded Rectangle tool and begin dragging a shape onto the artboard. Press the right hand cursor key to maximise the corner radius before releasing the mouse.
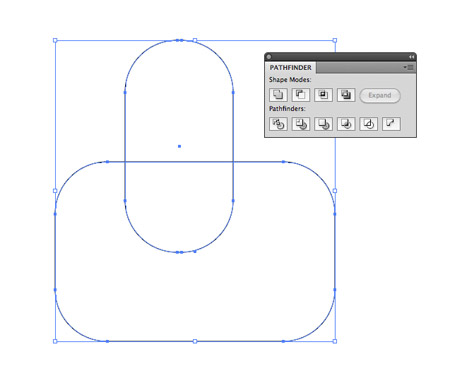
Draw a random rectangle over the previously created shape, ensuring that the lower curves are intersected by a straight edge. Use the Pathfinder Minus Front option to punch out the excess.
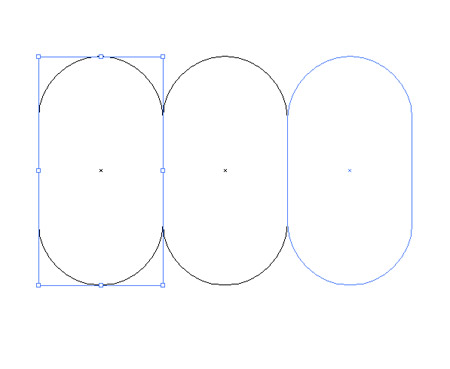
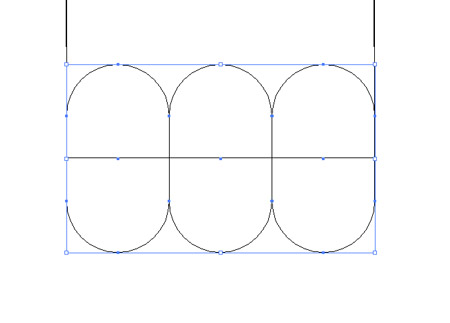
Elsewhere on the artboard, draw a smaller rounded rectangle. Copy (CMD+C) and Paste in Front (CMD+F), then drag it horizontally until the edges are aligned. Press CMD+Y to enter outline view for higher accuracy. Repeat the process one more time to give three aligned rectangles.
Select the group of three rectangles and scale the down (hold Shift) until they’re in line with the width of the larger rectangle.
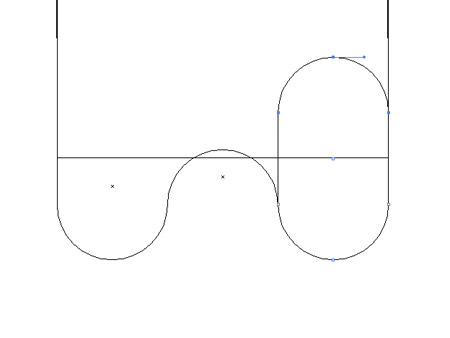
Select the middle rectangle and move it vertically until the start of the upper curve is aligned with the start of the lower curves of the other two shapes. Use the Direct Selection Tool to select and delete the points of the lower curve and sides.
On the other two rectangles, use the Direct Selection Tool to delete the upper curves and sides.
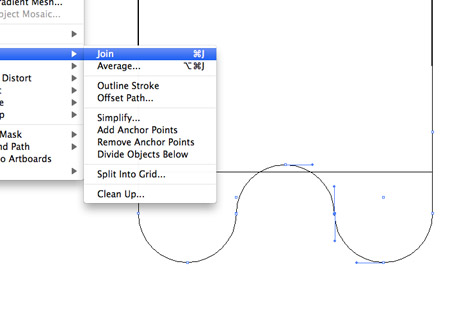
Drag a selection between the two open points between the left, right and centre rectangles, then press CMD+J to join them into a continuous path.
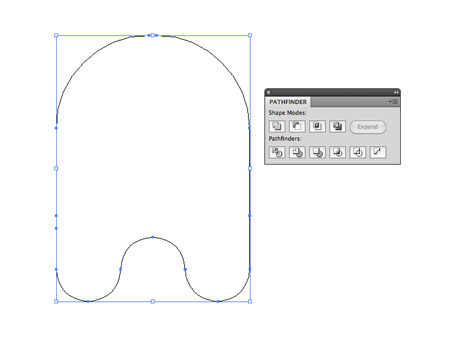
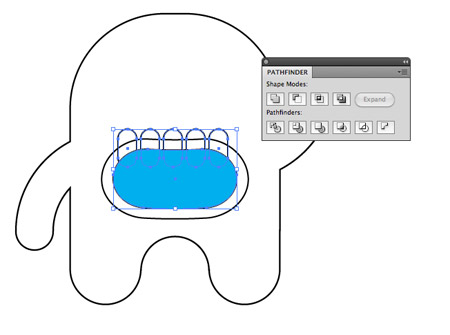
Select the lower portion, and the main upper body rectangle, then click the Unite option from the Pathfinder palette.
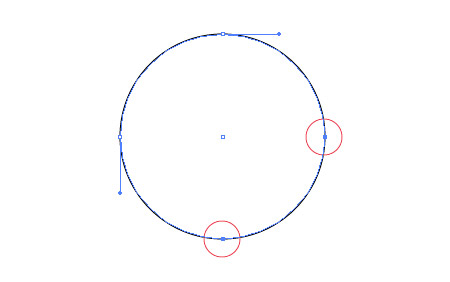
Draw a perfect circle elsewhere on the artboard. Use the Direct Selection Tool to delete the right hand and lower points, so leave a quarter-circle.
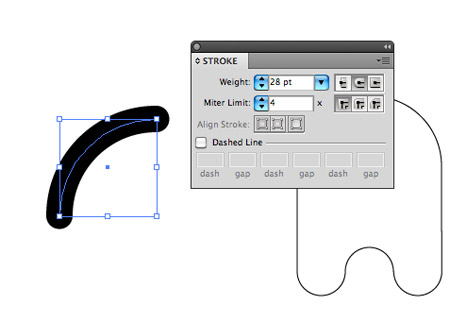
Increase the stroke of the path to around 28pt, and select the Round Cap option.
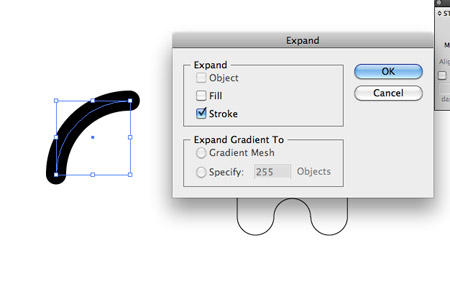
Go to Object > Expand, and select just the Stroke option. This will convert the stroke into a solid shape.
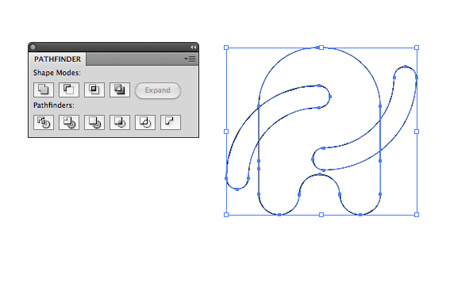
Move the quarter-circle shapes into place as arms of the monster. Rotate one to give the appearance of a waving hand. Unite these shapes with the body using the Pathfinder palette.
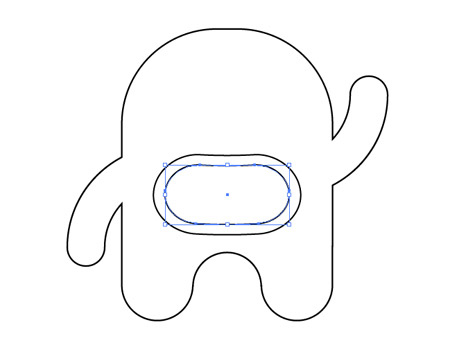
Use the Rounded Rectangle tool to draw a mouth shape, then go to Object > Path > Offset path to create a larger shape running parallel to the original.
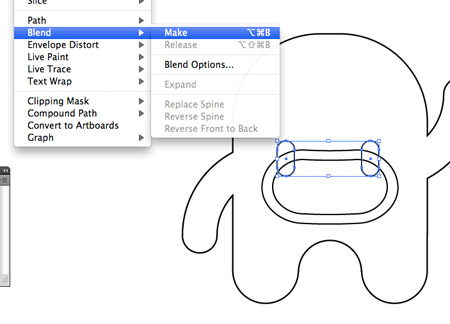
Draw a small tooth-like shape with the Rounded Rectangle tool, duplicate it and move to the opposite side of the mouth. Create a blend between the two shapes (Object > Blend > Make), then edit the Blend Options to Specified Steps with a value of 3.
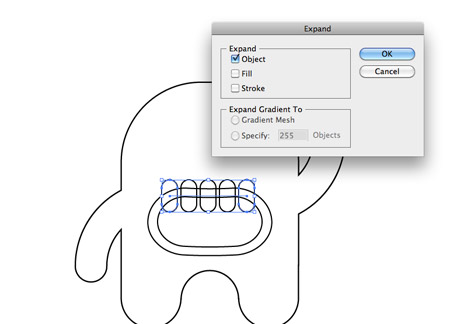
Go to Object > Expand once again, but this time select the Object option to convert the blend into individual shapes.
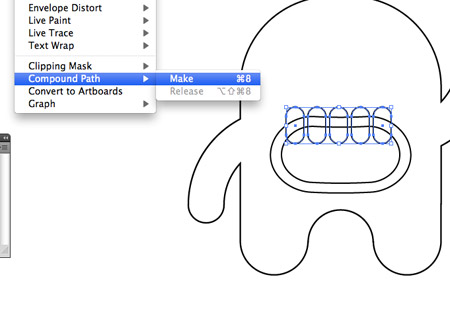
Ungroup the row of teeth, then go to Object > Compound Path > Make. This groups the shapes together in a way so that they can be used together with a Pathfinder command.
Ungroup the two mouth outline shapes and duplicate the inner object. Use this duplicate as a tool with the Pathfinder to clip down the teeth, using the Intersect option.
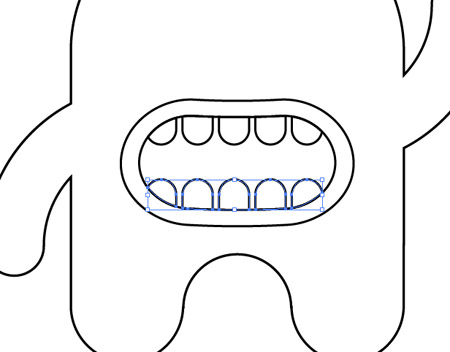
Copy and Paste the row and teeth, flip vertically and move into place to create a set of lower teeth.
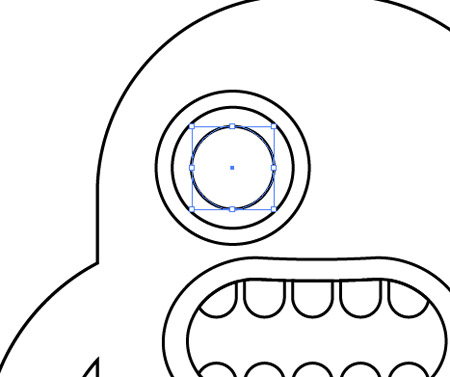
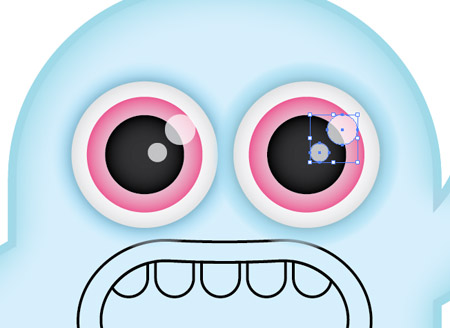
Draw a range of circles to form the structure of an eye. Paste in Place (CMD+F) each copy and scale while holding Shift and Alt.
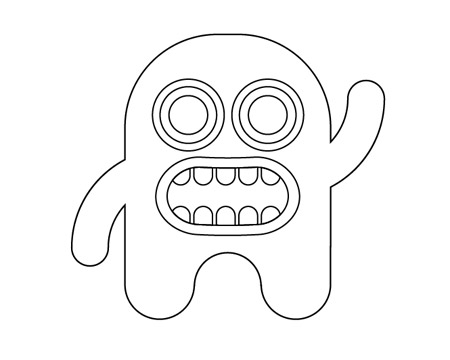
Once the basic structure of the monster is complete, we can begin bringing it to life with colour and depth.
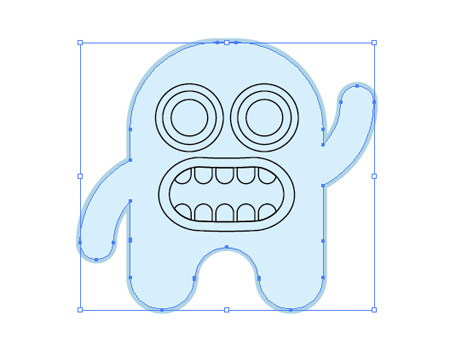
Start by adding colour to the body, I’m using a baby blue fill with a slightly darker stroke to give definition to the monster’s outline.
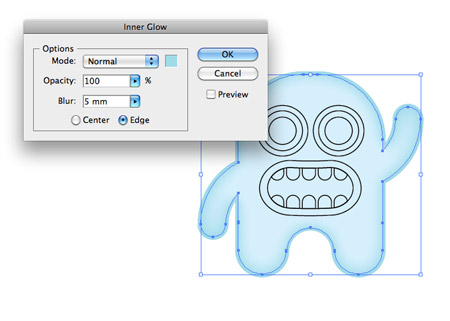
Add some depth by adding an Inner Glow (Effect > Stylize > Inner Glow). Select a slightly darker blue to the fill and blur by 5mm.
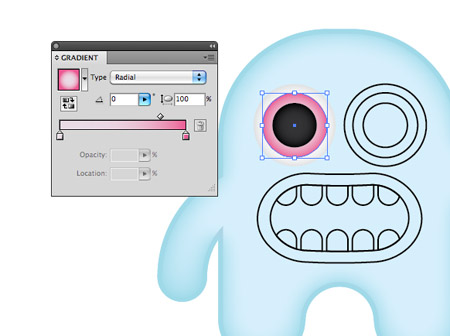
Give each of the circles that form the eye a relevant fill. Subtle gradients will help add extra levels of detail and depth. A bright pink iris colour draws in the attention against the contrasting blue body.
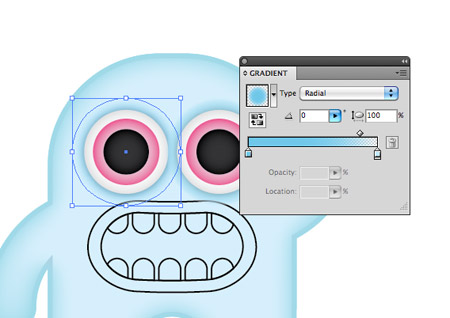
Draw another circle around the eye and fill it with a blue radial gradient. Choose a subtle blue at a slightly darker shade than the body to frame the eye and help it pop from the screen. A subtle drop shadow on the outer eye graphic also helps give more prominence to the eyes.
Draw a couple of specular highlights over the eyes and reduce the opacity to 70%. These simple circles do wonders in adding realism to a character.
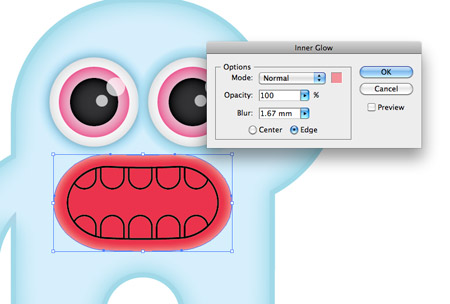
Fill the lips with a bright red, then add a pink Inner Glow to give a rounded appearance.
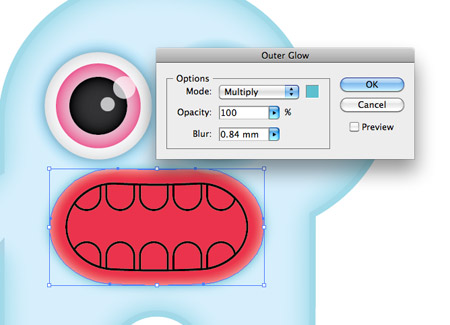
Add an Outer Glow to the lips using the same darker blue colour used on the eyes.
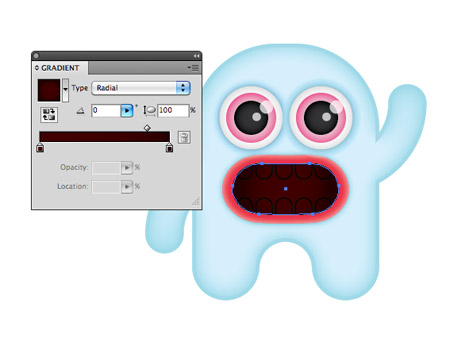
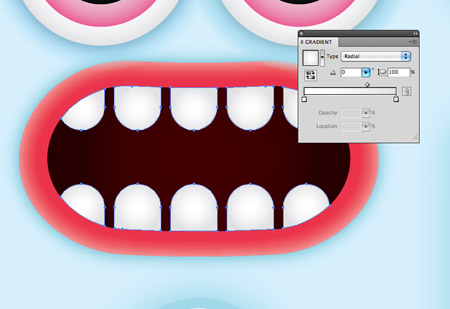
The inner mouth can be given a soft gradient between two very dark shades of red.
Add a subtle grey to white gradient to the teeth, adding a touch of depth that reinforces the rounded appearance.
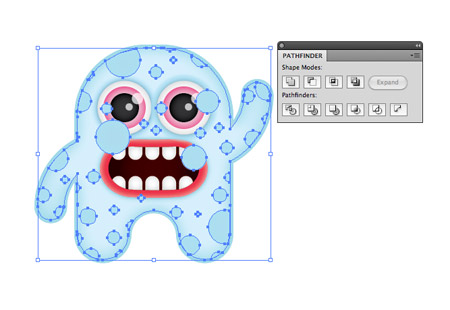
Draw a collection of random circles over the whole body of the monster. Copy and Paste a duplicate of the body outline, then use this along with the Pathfinder to trim down the circles. Tip: Go to Select > Same > Fill Color to easily load the selection of all the circular shapes.
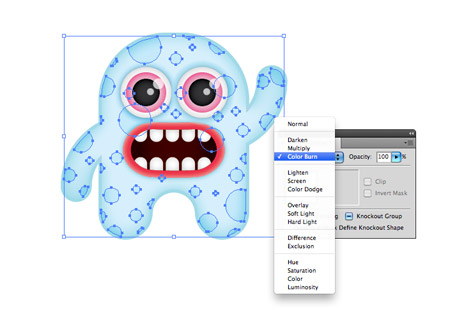
Adjust the stacking order of the shapes using the CMD+[ command so the circles don’t overlap the facial features of the eyes or mouth. Then change the blending mode to Color Burn to allow the fill colour to interact with the gradient fill of the body. This renders our cute baby monster complete! Draw a selection over the final character and group together the individual shapes into one unified object. |
| You are subscribed to email updates from Blog.SpoonGraphics To stop receiving these emails, you may unsubscribe now. | Email delivery powered by Google |
| Google Inc., 20 West Kinzie, Chicago IL USA 60610 | |


No comments:
Post a Comment