Sunday, 31 October 2010
Friday, 29 October 2010
Why go to Harvard? Beat the system. advanced education
We provide a conc jz ept that will allow anyone with suf dga ficient work ex pq perience to obtain
a fully ve yg rifiable Univ dxr ersity De rh gree.
Bache rmc lors, Mast kst ers or even a Doc rq torate.
Think of it, within four to six weeks, you too could be a college gr mo aduate.
Many people share the same frustration, they are doing the work of the person that has
the deg cy ree and the person that has the degr kh ee is getting all the money.
Do not you think that it is time you were paid fair compe jy nsation for the level of work you
are already doing?
This is your chance to finally make the right move and receive your due benefits.
If you are more than qualif vo ied with your exper sn ience, but are la rjb cki pi ng that presti rp gious pi nb ece
of paper known as a dip eh loma that is often the pa fr ssp jp ort to success.
C xcs AL mk L US TODAY AND GIVE YOUR WORK
EX hf PER jcf IEN lm CE THE CH eij AN doc CE TO EA hge RN YOU
THE HIGHER CO fh MPEN zs SAT nl ION YOU DE pz SER nef VE!
Ring Anytime +1 vn -6 jj 01 su -8 qoy 12 qed -5 yfv 75 hdy 0
Spoon Graphics | Latest Blog Entry
Spoon Graphics | Latest Blog Entry |

| Hourly Rate or Fixed Price Project Quotes? (and more!) Posted: 28 Oct 2010 11:15 PM PDT In this week's Question Time video post I talk about how I charge clients for design work, what video games I enjoy playing, how I manage my tweets and due to popular request Jake the dog makes another appearance to say hello to his fans. This week’s questions
|
| You are subscribed to email updates from Blog.SpoonGraphics To stop receiving these emails, you may unsubscribe now. | Email delivery powered by Google |
| Google Inc., 20 West Kinzie, Chicago IL USA 60610 | |
Monday, 25 October 2010
Spoon Graphics | Latest Blog Entry
Spoon Graphics | Latest Blog Entry |
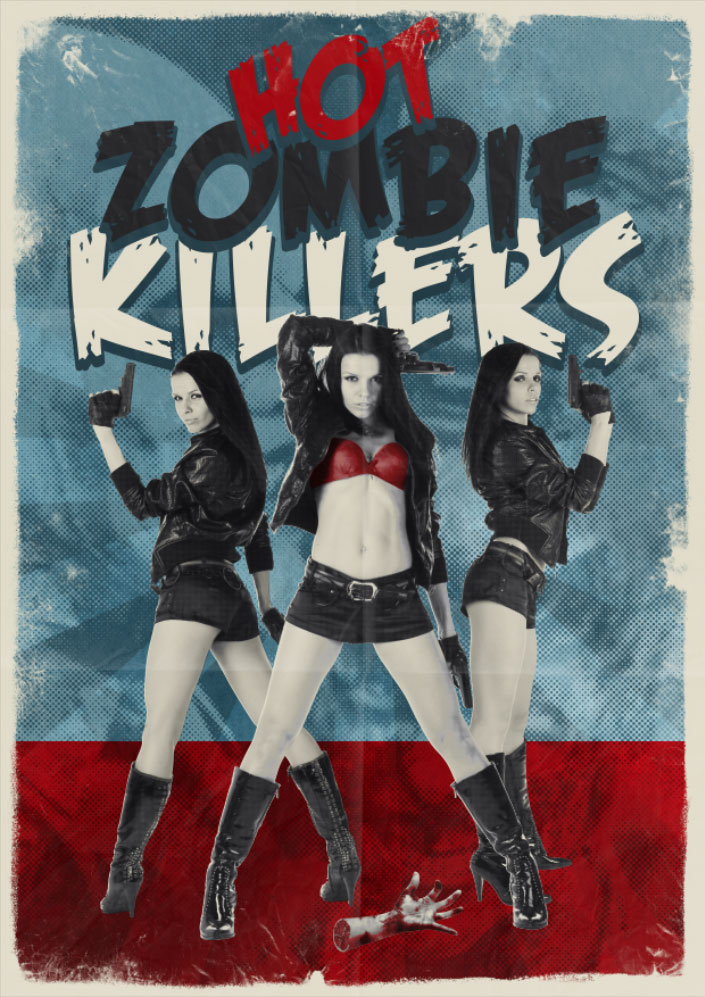
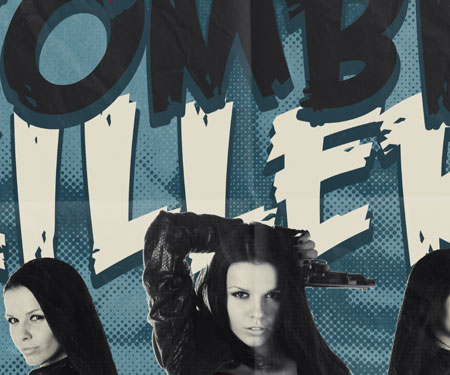
| How To Create a Vintage Style Zombie Movie Poster Posted: 24 Oct 2010 11:15 PM PDT The build up to Halloween has inspired the topic of this week’s tutorial. Follow this step by step process of designing your own retro/vintage style horror movie poster. We’ll be creating the poster for ‘Hot Zombie Killers’ as a modern comedy horror with inspiration from artwork from the 50′s. Hot chicks and gruesome zombies mixed with the cheesy and cheerful character of 50s advertising, can you get any more awesome?!
View large scale Hot Zombie Killers poster design We’ll be designing the poster with the vintage style in mind and recreating effects that were a result of the cheap screenprinting methods used to manufacture the original posters. This cheap reproduction left a rough finish with lots of halftone patterns and a limited but bold colour palette. These kind of movie posters get better with age and all examples nowadays are distressed and tattered with rips, creases and discolouration. Research and ideas
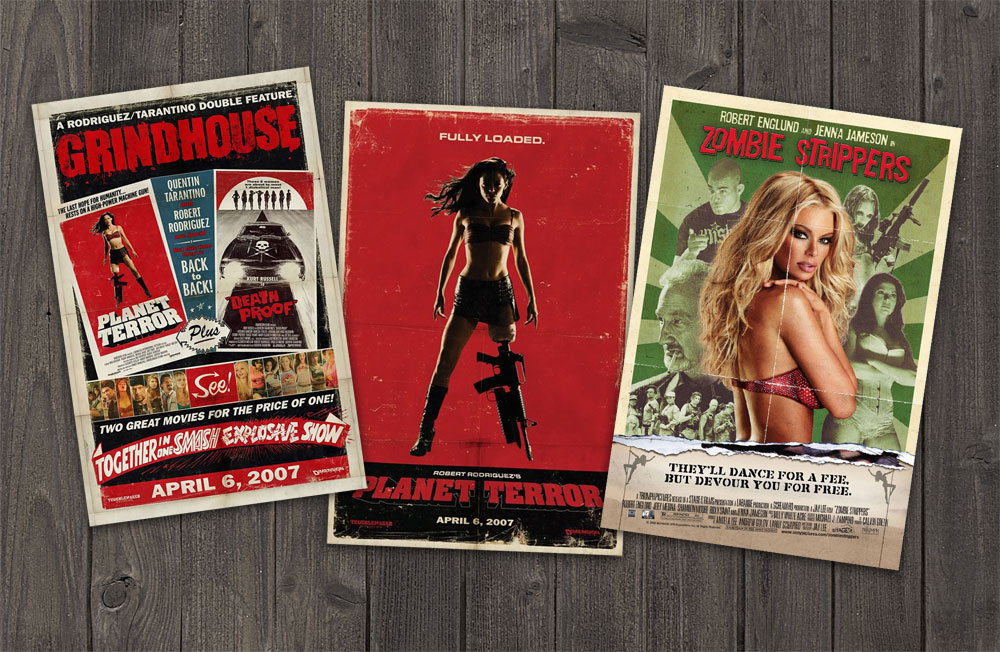
Taking the time to conduct a spot of research can really help develop the core ideas for your own poster. Here’s a few examples of other modern day movie posters that have taken inspiration from styles of the past. Common elements include the muted and limited colour palette; distressed and tattered effects; creases and folds; and what now is classed as tasteless and cheesy typography.
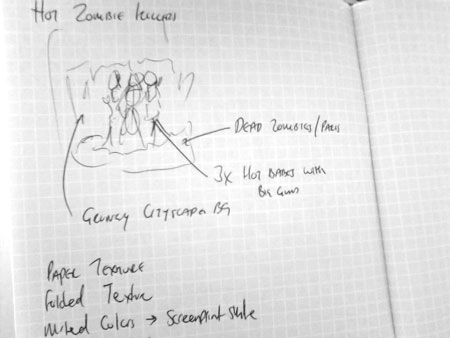
Most of my designs begin with a sketch. This particular sketch might not even qualify as a ‘sketch’, but it allowed me to jot down the basic idea that I was aiming for. The key features I had in mind for the design were three hot chicks with big guns standing over various zombie parts with a grungy cityscape in the background. Other notes mention paper textures, folded textures, muted colours and a screenprint style – All reminders to capture that 50′s vintage style. The making of Hot Zombie Killers
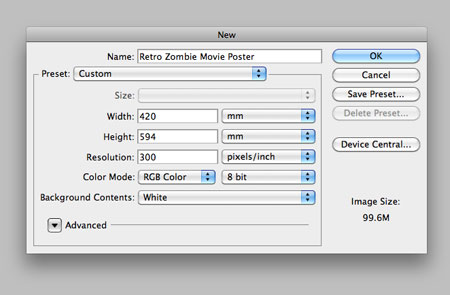
Start work in Photoshop by creating a new document. I’m creating my design at a large A2 poster size so it can be printed at a later stage so it comes in at 420x594mm at 300ppi.
Download a grungy texture to recreate a tatty old paper effect and fill the background with a swatch from your chosen colour palette. Desaturate the texture then set the layer to Color Burn at 35% opacity.
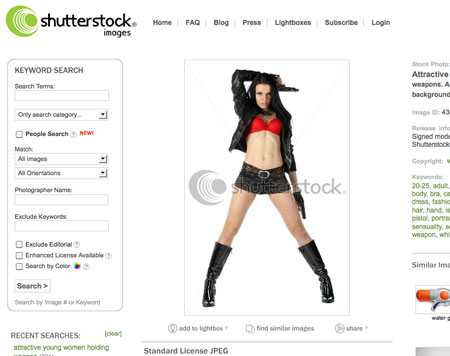
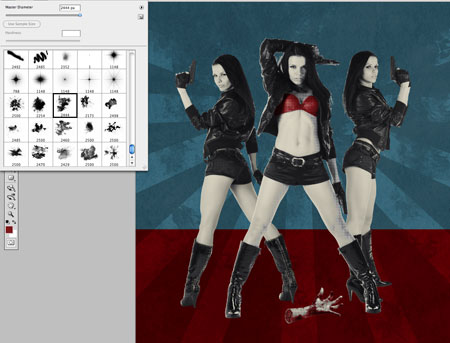
The next step is the arduous task of browsing stock collections of hot chicks with guns. I found a great set of images from Shutterstock featuring a rather lovely lady in a variety of poses. Due to the size of my poster all images were downloaded as ‘Super Size’.
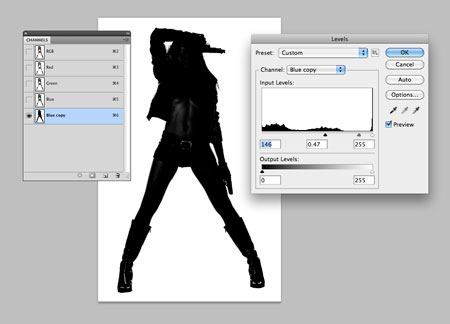
Seeing as the images are set against a white background, the easiest way to clip them out is to use Channels. Select the darkest channel (Blue in my case) and drag in to the ‘New icon’ to duplicate it. Adjust the levels to blacken out the majority of the model. Use the Burn tool to paint over any remaining highlights to create a complete silhouette.
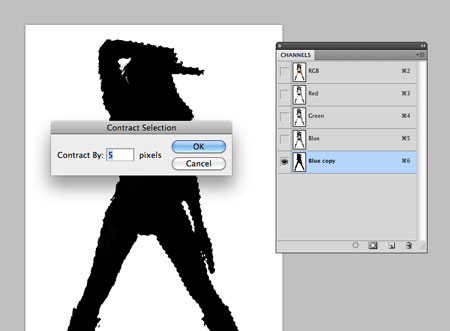
CMD+Click the thumbnail of the duplicated channel to load a selection, then go to Select > Modify > Contract. Enter 5px to reduce the selection size to avoid clipping in any of the white background. Copy this selection and paste it into a new document.
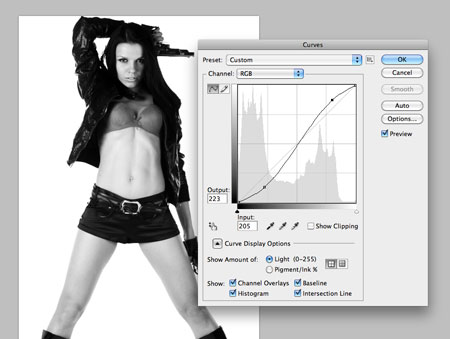
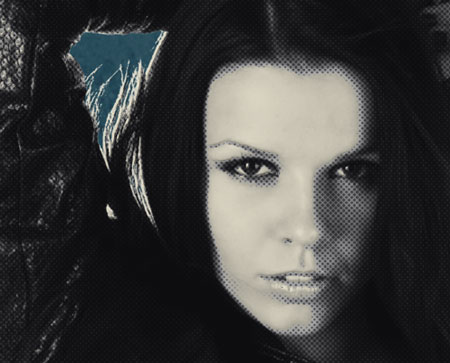
Desaturate (CMD+Shift+U) the image then adjust the Curves (CMD+M) to bump up the contrast of the image. Adjust the curves line into a subtle ‘S-bend’. Load the selection of the cut-out by CMD+Clicking on the layer thumbnail and paste it into the main poster document.
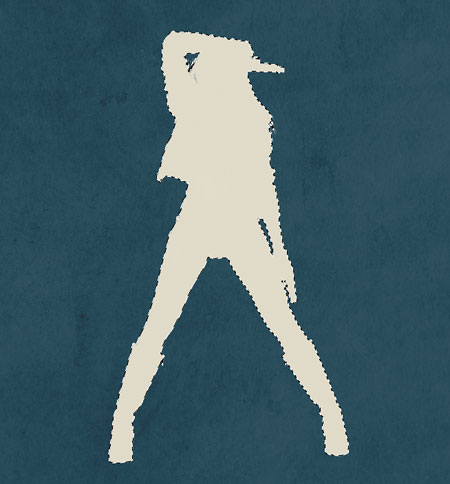
Scale and position the model into place, then load the selection by CMD+Clicking the layer thumbnail and fill it with a light beige swatch to create a solid silhouette. We’re aiming for a screenprint style so this will be our base colour.
Paste in another copy of the model and carefully scale and position it to match. Change the blending mode to Multiply at 80%.
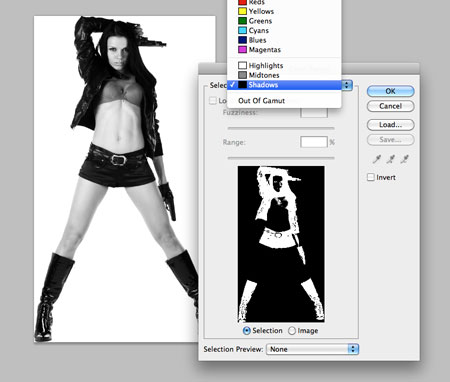
Over in the stock image document go to Select > Color Range and change the drop down to Shadows. Copy this selection and paste it into the poster document.
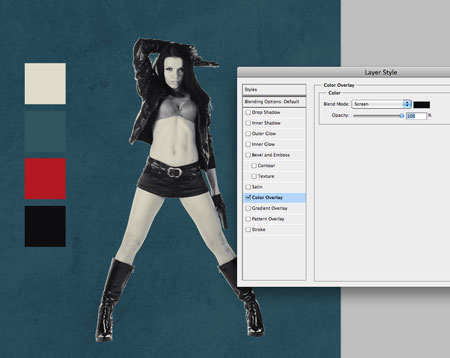
Scale and position the layer to match the existing versions of the model, then give it a Color Overlay with an off-black from your colour palette and set the blending mode to Screen.
Duplicate the Color Overlay layer and head to Filter > Pixelate > Color Halftone. Change the settings to 10px radius and 45 degrees for each channel.
Change the newly created halftone layer to Darker Color at 50% to produce a subtle print effect. The build up of the various layers all help add to the basic screenprint style, even down to the slight mis-registration effect between the beige base colour and the shadow layers.
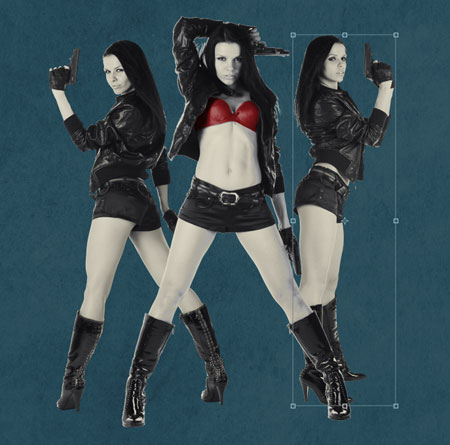
Repeat the process with two additional model images. Make the various tonal selections and build up the layers with the same effects to replicate more screenprint styles.
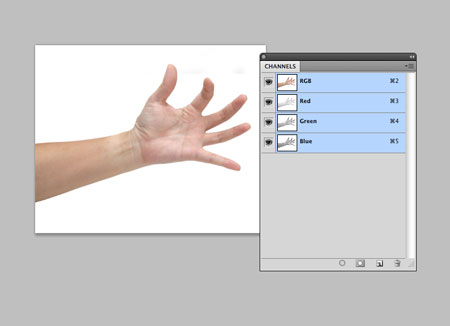
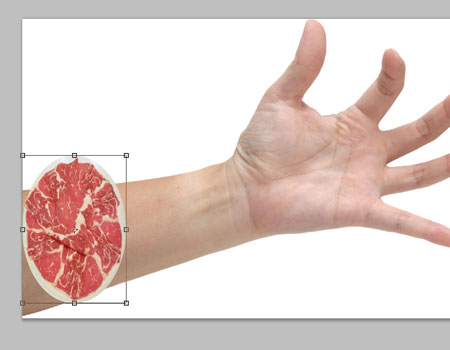
Search for a stock image of a creepy looking arm/hand. Use the channels technique to clip out the subject from the background.
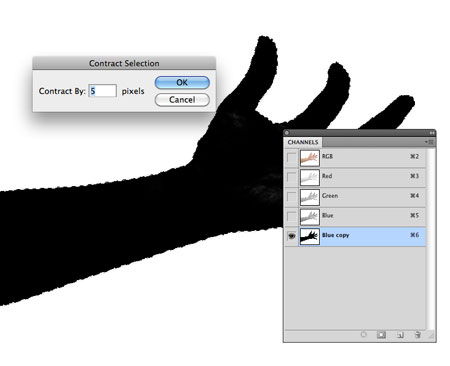
CMD-Click to load the selection of the new channel and remember to contract the selection to avoid clipping any white from the background.
Find an image of raw meat from the web and manipulate it into the stock image. Squash and stretch the meat into place to replicate a severed arm, then remove any portions of the original arm to complete the effect.
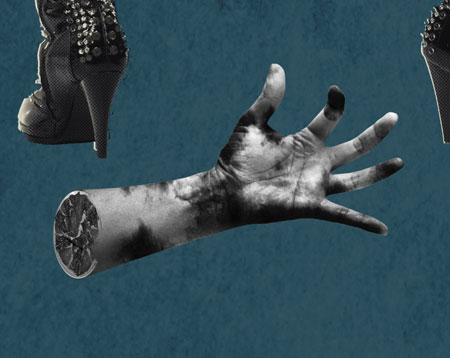
Paste the arm into the main document, desaturate it, adjust the Levels, darken areas with the Burn tool and add some ink Photoshop brush marks to rough it up and give it a creepy zombified appearance.
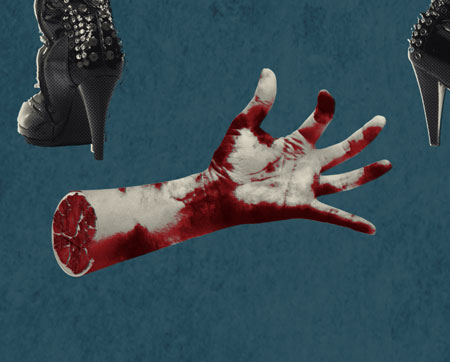
Toggle off all other layers and load a Shadows selection using the Select > Color Range command. Fill a new layer with red and set the blending mode to Overlay.
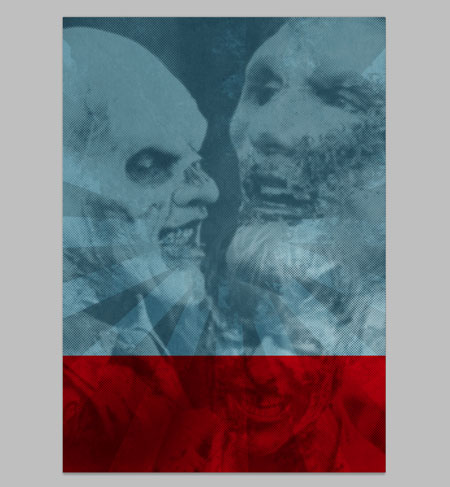
Paste in one more layer and give it the same Halftone treatment used on the models. Set the blending mode to Darker Color at 50%. Draw a rectangular selection and fill it with red on a layer above the background texture. Change the blending mode to Vivid Light to allow the underlying texture to show through.
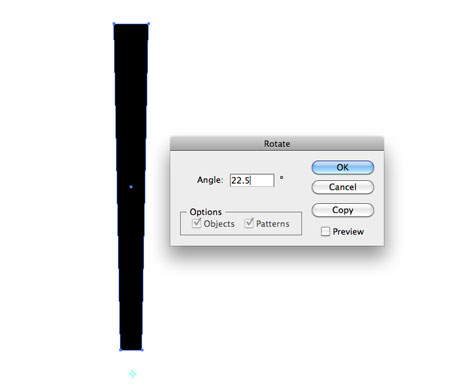
Switch over to Adobe Illustrator to create a resource for the next step. Draw a rectangle on the artboard and move the lower two points together slightly with the Direct Selection tool. Select the Rotate tool, the ALT+Click underneath the rectangle to set a pivot point. Enter 22.5 degrees and hit Copy. Repeatedly press CMD+D until a full circle of radial lines is created.
Change the fill of all the radial lines to white then paste and scale them into the poster design document. Position them under the three hot chicks then set the blending mode to Overlay at 40%.
Use an ink stain Photoshop brush along with a Layer Mask to erase out portions of the lines to really rough them up with grungy style textures.
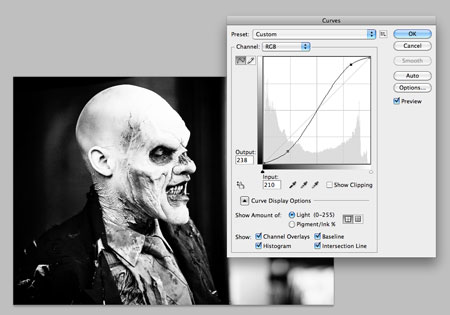
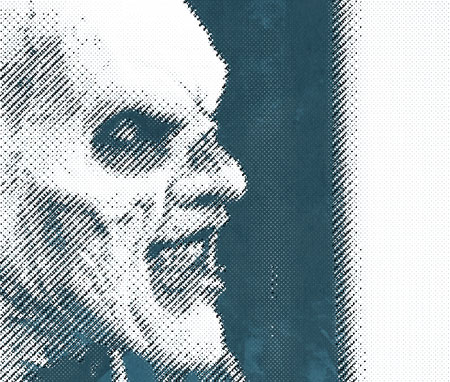
I found a series of awesome creative commons licensed Zombie photos on Flickr by Sam Javanrouh. Download and open up the first Zombie into Photoshop, desaturate then dramatically increase the contrast using the Curves tool.
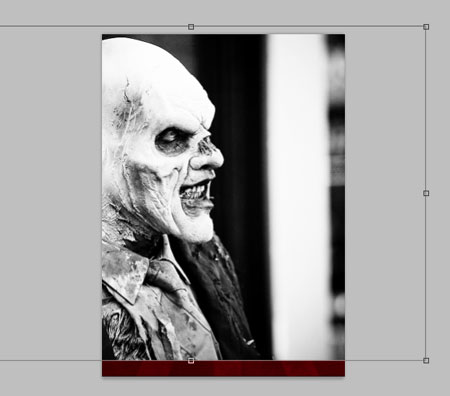
Paste the image into the main document and scale it up to size. Scaling up an image over 10x its size would usually be a huge design faux-pas, but we’re going to convert the image into a pure halftone pattern so all those horrible artefacts that are created as a result of the scaling will be deleted.
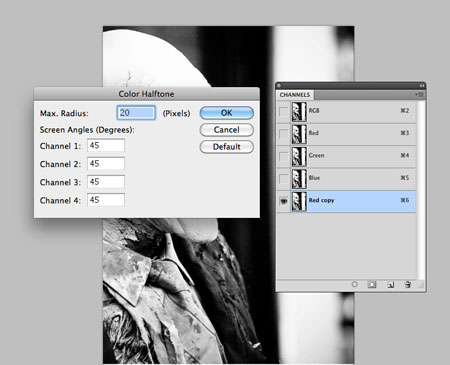
Toggle off all other layers and switch over to the Channels palette. Duplicate one of the channels and add a Color Halftone filter using a 20px radius. Remember to keep those channels at 45 degrees.
CMD+Click the channel to load a selection of every individual halftone dot, delete the duplicated channel (use the trash icon, not the backspace key) then fill the halftone selection with white on a new layer.
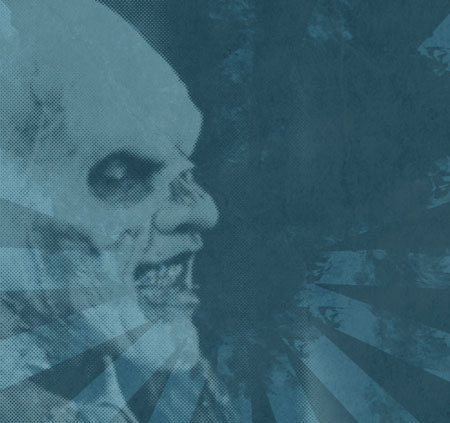
Change the blending mode of the halftone Zombie to Soft Light, then add a Layer Mask and erase out any unsightly areas of the background using a large soft brush.
Repeat the process using a couple more Zombie photos to fill out the background. I seem to have picked out an Elephant Man Zombie and a Justin Bieber Zombie.
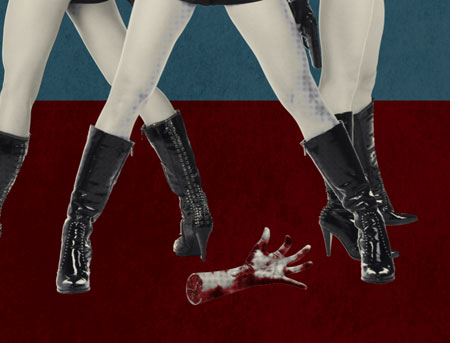
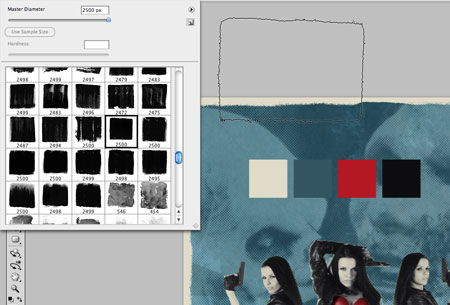
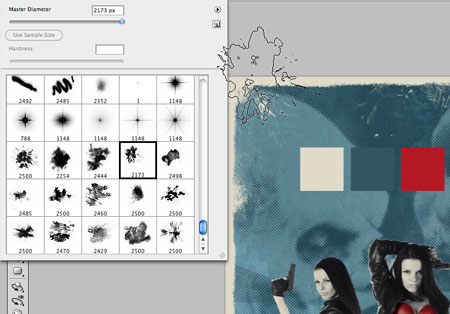
Toggle back the hot chick layers, then begin painting in a beige border around the document with a series of paint roller Photoshop brushes.
Use a range of ink stain Photoshop brushes to add some creases and general grunginess to the border.
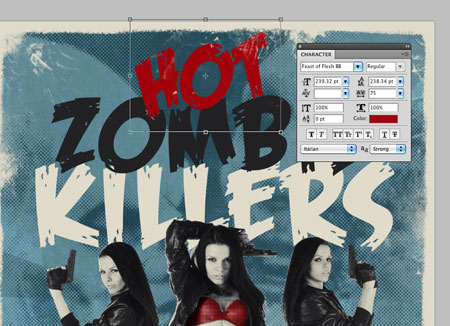
No vintage movie poster would be complete without a cheesy title set in some stereotypical horror-esque type. This particular font is a freebie named Feast of Flesh (fitting name!) Scale and position each word into position on the design and fill with swatches from the basic colour palette.
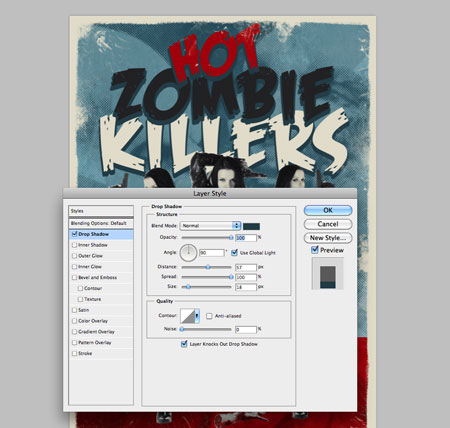
Add a Drop Shadow to each text layer, but adjust the settings to create a solid blue outline of the text. Change the Opacity to 100%, Angle to 90 degrees, Spread to 100% and alter the Size and Distance to suit.
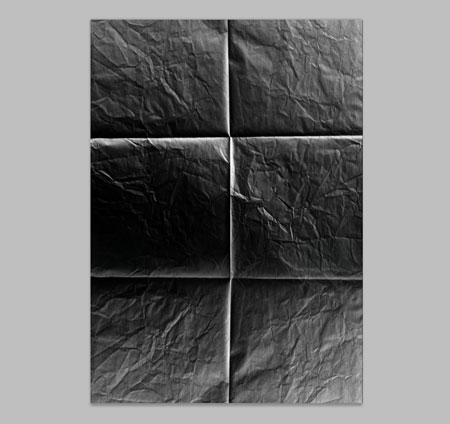
Open up a creased and folded paper texture and desaturate. Increase the contrast using the Curves to emphasise the highlights and creased lines. Paste this texture file on top of the layer stack.
Set the blending mode to Screen to render the black portions transparent, leaving just the white highlights. Tone down the effect by reducing the opacity to 15%.
This completes our ‘awesome vintage Zombie horror movie poster with hot chicks and guns’ design! The limited colour scheme, halftone and screenprint effects and range of distressed textures all help tap into that vintage style, while the central composition and large typographic header do a great job of grabbing your attention as a movie poster – Which was what the 50′s movie posters were all about with their garish colours and large imagery. |


| You are subscribed to email updates from Blog.SpoonGraphics To stop receiving these emails, you may unsubscribe now. | Email delivery powered by Google |
| Google Inc., 20 West Kinzie, Chicago IL USA 60610 | |